Generate Mailbox Size and Usage Report using PowerShell for Exchange 2010 / 2013

So I recently wanted to create a report to show us who was using up the most space on our mailbox servers, previous administrators had either done away for limits for mailboxes or had set them to be very very generous and our users weren’t really the ones to either keep their mailbox tidy or archive items away.

I knew the quick and easy solution would be powershell and then getting the output to either a CSV file or HTML.  So a bit of a look around TechNet for Get-MailboxStatistics got me the commands I needed, but what else could I select out of that.  After a bit more digging I found a list on MSDN for MailboxStatistics members which allowed me to extract exactly what I was after.  After putting all that together, I cam up with the following

Get-Mailbox -ResultSize Unlimited | Get-MailboxStatistics | Select DisplayName,
TotalItemSize,ItemCount,Database,LastLogonTime,LastLoggedOnUserAccount | Sort 
TotalItemSize -Descending | ConvertTo-Html -Title "Mailbox Stats"| 
Out-file "C:\MailboxStatistics.html"

That gave me a nice HTML page output, you could easily improve on this with colours depending on outputs from StorageLimitStatus or LastLogonTime where we found that some mailboxes hadn’t even been used.
Blank page (auth.owa Http 500) when logging into Outlook Web Access running on Exchange 2010

Recently had to restart a client’s server after running some Windows Updates. A few hours after the restart the client contacted me stating that they couldn’t access their e-mails via the web.  I quickly had a look, the login page presented itself, so I logged in and after clicking Sign in I was presented with a blank page pointing to auth.owa.  This was a little puzzling as there were no updates for Exchange so why did it break?  Checking the IIS logs, I found that the error was 500 which indicated some kind of authentication error.

A little powershell cmdlet you can run is Test-OWAConnectivity. So I ran the cmdlet and recieved WARNING: An unknown failure occurred during logon. So I checked IIS and ensured that all of the authentication was set correctly and indeed it was.  So after some poking around on the web I found out Exchange 2010 palms off the Forms Based Authentication to a seperate Service called  Microsoft Exchange Forms-Based Authentication Service. Starting this service fixed the blank page issue and allowed clients to authenticate correctly.

Exchange Management with AD Users when using RSAT for Windows 7

One of the little things with the have annoyed me since I’ve started using the RSAT tools in Windows is the fact that there is no easy way to manage Exchange. Sure I can install the Exchange Management Pack and use that, but like most admin’s AD Users and Computers is open just about all the time.

First thing you will want to do is go and download the Exchange System Manager for Windows Vista (located here). Once downloaded, extract the .exe file so that you have an ESMVISTA.MSI file. Now that’s extracted, open up a command prompt window and move to the location that ESMVISTA lives. Type in the following:

ESMVISTA.MSI /Q

With that command line the message is surpressed and the installation continues without any issues under Windows 7. This will only work for Windows 7 32-Bit and I have not found a way to get it working with 64-bit.

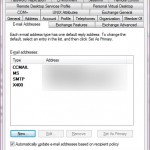
After a few minutes you will be able to open up AD Users and computers, right click and you will have the extra Exchange Tabs (pictured right), making Administration a little easier.

Letting Exchange accept Mail from other domains

One of the usual things I perform as an IT Consultant is maintenance and configuration tasks on Exchange. One of the most requested tasks is accepting e-mail for more than one domain. Most of my clients run Windows SBS Server 2008 which comes with Exchange 2007. In this article I will walk through accepting mail from other domains.

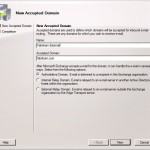
Firstly, open up the management console, expand Organization Configuration, click on Hub Transport and finally select the Accepted Domains tab. Now under the Actions for Hub Transport click New Accepted Domain…

The New Accepted Domain window now pops up. Configure it with your new domain.  The domain must be yours and  its MX record configured to point to your exchange server. After you enter your domain, there are three options to tell exchange how to handle mail. Authoritative Domain tells the exchange server to accept ALL e-mail for this domain, if a user doesn’t exist then an NDR is generated and sent to the sender. The Internal and External relay options are handy, if you have multiple domains with multiple exchange servers, you can choose the Internal Relay option, which will look for other exchange servers under the forest for your entire organisation.

The third option is the External Relay. This is useful for those domains which you don’t ‘own’.  A prime example are franchise companies. Which may have one e-mail for a particular store or location, allowing you to send and receive for that domain to users not on your exchange server.

And That’s it. Simply ensure that the domain’s MX Record is pointing to your server, or if you are using the SBS POP3 Connector this will now properly process e-mails for that particular domain.